
Restore Peak Performance to Your GM Vehicle with a VIN-Programmed ECM
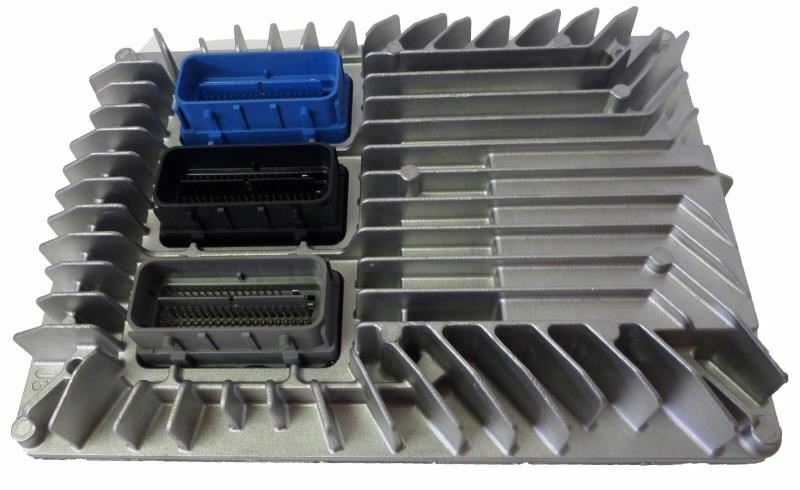
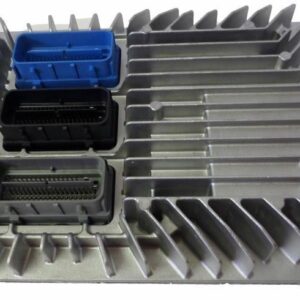
If you’re dealing with a frustrating check engine light, erratic engine behavior, or a no-start condition, a failing Engine Control Module (ECM) is often the culprit. As a technician with over two decades of experience under the hood, I’ve seen firsthand how a faulty ECM can turn a reliable vehicle into a source of constant headaches. This isn’t just a component; it’s the brain of your engine, and when it falters, everything from fuel economy to transmission shifting can suffer. This listing is for a dependable replacement ECM, part number 12651994, which also directly replaces part numbers 12643248, 12652814, and AA69.
The biggest hurdle with ECM replacement has always been the expensive and time-consuming programming required at a dealership. We eliminate that step entirely. Before we ship your part, we flash it with the latest official GM software updates using the VIN you provide. This ensures that the module is perfectly matched to your vehicle’s specific configuration, restoring its original performance and efficiency. This is the same process a dealer would perform, but delivered directly to your door, ready for installation.
Case Study: A Tricky Diagnosis
I remember a 2013 Cadillac CTS that came into the shop with a persistent P0171 (System Too Lean) code. The owner had already replaced the MAF sensor, all four O2 sensors, and even the fuel pump based on advice from forums. The car still ran rough and the light always came back. After hooking up my diagnostic scanner and monitoring live data, I noticed the short-term fuel trims were completely unresponsive. This pointed away from the sensors and toward the computer itself. A faulty driver circuit inside the original ECM wasn’t correctly processing the sensor data. We installed one of our VIN-programmed ECMs, performed the security relearn, and the car ran perfectly. It’s a classic example of how chasing symptoms can be costly; sometimes, you have to go straight to the source.
Is Your GM Vehicle Showing These Red Flags?
A failing ECM can manifest in numerous ways. If you’re experiencing any of the following, it’s a strong indicator that your engine’s computer may need replacement. This is especially true if you’ve scanned for codes and found internal processor faults.
- ✔ Check Engine Light is on with codes like P0601, P0606, or other U-series communication codes.
- ✔ The engine cranks but refuses to start.
- ✔ Noticeable drop in fuel economy (MPG).
- ✔ Stalling, stuttering, or hesitation during acceleration.
- ✔ Harsh or erratic automatic transmission shifting.
- ✔ Communication issues with your OBD-II scan tool.
- ✔ Intermittent problems that seem to have no logical cause.
A Straightforward Guide to Swapping Your ECM
While professional installation is always an option, many experienced DIYers can handle this job. The key is patience and following the proper procedure. As this is a pre-programmed module, no special scan tools are needed for programming.
- Safety First: Always disconnect the negative terminal from your vehicle’s battery and wait at least 15 minutes to allow all systems to discharge before starting work.
- Locate the ECM: On most of the compatible vehicles, the ECM is found in the engine bay, often on the driver’s side near the air filter box, behind the fan shroud, or on the passenger’s side firewall. Refer to your vehicle’s service manual for the exact location.
- Disconnect and Remove: Carefully unplug the wiring harness connectors. Most have a locking tab that needs to be released. Once disconnected, unbolt the module from its mounting bracket and remove it from the vehicle.
- Install the New Module: Bolt the new, programmed ECM into place. Securely reconnect the wiring harnesses, ensuring they click and lock into position. A clean, tight connection is critical.
- Reconnect the Battery: Re-attach the negative battery terminal.
- Perform Security Relearn: Many GM vehicles require a simple key-cycle security relearn procedure to sync the new ECM with the anti-theft system. This typically involves turning the key to the ‘ON’ position for 10-15 minutes, then ‘OFF’ for 10 seconds, and repeating this sequence three times. Your vehicle’s specific procedure is readily available online.
Verified Compatibility for Your GM Vehicle
We guarantee this module will function correctly for the following makes and models when you provide your VIN for programming. Please match your original part number or vehicle application from the list below.
CAMARO 12 3.6L (ID 12643248 or 12651994)
CAPRICE 12-13 3.6L
CAPTIVA SPORT 12-13 (LH engine compartment, ID 12643248 or 12651994)
CTS 12 3.6L (RH front engine compartment, ID 12641994 or 12643248)
CTS 13 3.0L or 3.6L (RH front engine compartment)
CTS 14 Cpe or SW, 3.0L or 3.6L
ENCLAVE 12 (behind fan shroud)
EQUINOX 12 (LH engine compartment)
IMPALA 12 (air cleaner bracket, ID 12641994 or 12643248)
IMPALA 13 (air cleaner bracket)
IMPALA 14-16 (VIN W, 4th digit, Limited)
LACROSSE 12 (LH engine compartment)
MALIBU 13 2.4L (LH engine compartment, ID 12643248, 12651994 or 12652814)
ORLANDO 12-13 (LH engine compartment, ID 12643248 or 12651994)
REGAL 12 (LH engine compartment)
SRX 12 (LH engine compartment)
TERRAIN 12 (LH engine compartment)
TRAVERSE 12 (behind fan shroud)
VERANO 12-13 (2.4L for 13)
What exactly is VIN programming?
What exactly is VIN programming?
VIN programming is the process of loading your vehicle’s specific software and calibrations onto the ECM. This includes information about your engine, transmission, emissions equipment, and factory options. By providing your Vehicle Identification Number (VIN), you ensure the module we send is a perfect software match for your car, eliminating the need for a dealer visit.
Do I need to do anything else after installation?
In most cases, you will need to perform a simple security relearn procedure, also known as a key cycle. This allows the new ECM to synchronize with your vehicle’s anti-theft system. This procedure does not require any special tools and can be found easily online or in your owner’s manual.
How do I find my original part number?
Your ECM’s part number is printed on a sticker directly on the module’s housing. You will need to locate the ECM on your vehicle to see it. This module replaces several part numbers, including 12651994, 12643248, and 12652814, so if your original matches any of these, this part will work.
Is this a new or used part?
This is a professionally inspected and tested, OEM-quality recycled part. Each unit undergoes a rigorous inspection and functional testing process to ensure it meets or exceeds original factory standards for performance and reliability before being programmed and shipped.