
Is Your Chevrolet Orlando Running Rough or Not Starting?
If your 2012 or 2013 Chevy Orlando is plagued by a persistent check engine light, experiencing erratic engine behavior, suffering from poor fuel economy, or has simply refused to start, a failing Engine Control Module (ECM) is a very likely culprit. As the brain of your vehicle’s engine, a faulty ECM can cause a cascade of frustrating and difficult-to-diagnose problems. Don’t let a bad computer keep your reliable Orlando off the road.
The Simple, Direct-Fit Solution
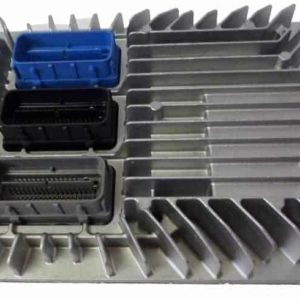
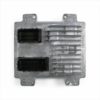
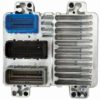
This is a genuine replacement Engine Control Module, part number 12616889, that arrives at your door fully programmed to your vehicle’s specific Vehicle Identification Number (VIN). We handle the complex part for you. By flashing the unit with the latest official GM software updates before it ships, we eliminate the need for an expensive trip to the dealership for programming. This is a true plug-and-play solution designed to get you back on the road quickly and affordably.
Expert Pro Tip: Check Your Grounds Before Condemning the ECM
In my 20+ years of diagnostics, I’ve seen countless ECMs replaced unnecessarily. Before you install the new module, take 10 minutes to inspect and clean the main engine-to-chassis ground straps. A corroded or loose ground can cause voltage drops that mimic ECM failure, leading to a host of bizarre electronic issues. A quick cleaning with a wire brush can sometimes be the real fix and will ensure your new module has a stable connection to operate correctly.
Common Symptoms of a Failing Orlando Engine Control Module
A failing ECM can manifest in many ways. If you’re experiencing any of the following, this module is the solution you need:
- ✔ Unexplained Check Engine Light (with codes like P0601, P0606, or U-series communication codes)
- ✔ Engine stalling, stumbling, or misfiring
- ✔ Complete no-start or intermittent starting condition
- ✔ Noticeable decrease in fuel efficiency
- ✔ Harsh or incorrect automatic transmission shifting
- ✔ Failure to communicate with diagnostic scan tools
Easy Installation: Get Your Orlando Running in Under an Hour
Replacing the ECM on your Orlando is a straightforward job that most DIY mechanics can handle with basic tools. The module is located in the left-hand (driver’s side) of the engine compartment.
- Safety First: Disconnect the negative terminal from your vehicle’s battery and wait a few minutes for the system to fully discharge.
- Locate the ECM: Find the module on the driver’s side of the engine bay. It will have several large electrical connectors attached.
- Disconnect Connectors: Carefully release the locking tabs on each wiring harness connector and pull them straight out. Never force them. Inspect the pins for any corrosion or damage.
- Remove the Old Module: Unbolt the old ECM from its mounting bracket.
- Install the New Module: Bolt your new, pre-programmed ECM into place.
- Reconnect Everything: Firmly plug the wiring harnesses back into the new module until they click, and then reconnect your battery terminal. Your vehicle is now ready to start.
Guaranteed Compatibility
This module is a direct replacement for a wide range of GM vehicles and part numbers. Simply provide your VIN at checkout, and we’ll ensure it’s programmed perfectly for your vehicle. This unit is compatible with part numbers: 12616889, 12630908, 12637106, 12642665, 12650256, and 12651993. While this listing is for the 2012-2013 Orlando, it also fits models like the Impala, Captiva Sport, Camaro, CTS, and more, ensuring a high-quality, tested component.