Is Your 2009 Cadillac SRX Running Rough or Not Starting?
A failing Engine Control Module (ECM) can be the source of some of the most frustrating and difficult-to-diagnose issues. If your SRX is experiencing problems like a persistent Check Engine Light, poor fuel economy, stalling, hesitation, or a complete no-start condition, the vehicle’s central computer may be the culprit. In my 20+ years as a technician, I’ve seen how a faulty ECM can mimic a dozen other problems, leading to wasted time and money on unnecessary parts. This isn’t just a component; it’s the brain of your engine, and when it fails, your vehicle’s performance and reliability are compromised.
The Direct Solution: A VIN-Programmed ECM Ready for Installation
Get your luxury crossover back to peak performance with this direct-fit Engine Control Module. We take the guesswork and hassle out of the repair by pre-programming this unit specifically for your vehicle using your VIN. This means it arrives at your door with the latest, most stable software updates from GM, ready for a straightforward installation. No need to schedule an expensive appointment at the dealership for programming.
- ✔ VIN-Matched Programming: We flash the module to your specific vehicle, ensuring perfect compatibility and function right out of the box.
- ✔ Latest GM Software: Loaded with the newest factory updates to improve performance, efficiency, and reliability over your original unit.
- ✔ Plug-and-Play Simplicity: Avoids the need for specialized tools or a trip to the dealer for software installation.
- ✔ Restores Engine Performance: Corrects issues with fuel mixture, spark timing, and transmission shifting controlled by the ECM.
- ✔ Cost-Effective Repair: A smart, affordable alternative to the high costs associated with dealership parts and labor.
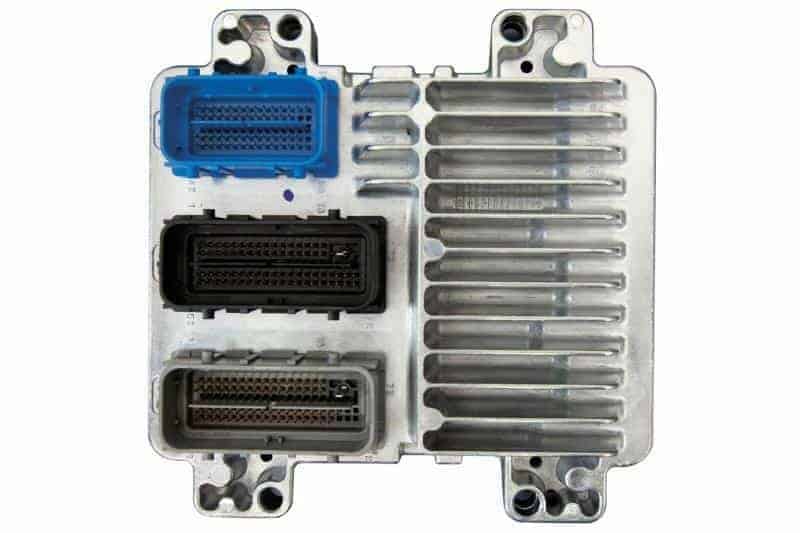
Expert Pro Tip: Check Your Connectors First
Before you install your new ECM, take a moment to inspect the vehicle’s wiring harness connectors that plug into the module. Over the years, moisture and dirt can cause corrosion on the pins. I’ve seen cases where a perfectly good replacement ECM was damaged because of a poor connection. Use a small brush and some quality electronics cleaner to ensure the terminals are bright and clean. This simple five-minute check ensures a solid connection and protects your investment.
Easy Installation for the DIYer or Professional
Replacing the ECM on your 2009 SRX is a manageable job. The module is located in the engine compartment on the driver’s side (LH side). With basic hand tools, you can have your vehicle running properly again in under an hour.
- Safety First: Always disconnect the negative terminal from your vehicle’s battery before starting any electrical work.
- Locate the ECM: Open the hood and find the ECM mounted in the driver’s side of the engine bay.
- Disconnect the Harnesses: Carefully release the locking levers or tabs on the electrical connectors and pull them straight off the module. Do not force them.
- Remove the Old Module: Unbolt the ECM from its mounting bracket and remove it from the vehicle.
- Install the New ECM: Mount your new, pre-programmed module in place and securely tighten the bolts.
- Reconnect Everything: Plug the wiring harnesses back in, ensuring they click securely into place. Reconnect the negative battery terminal.
- Perform Key Cycle: Turn the key to the ‘ON’ position (without starting the engine) for 10-15 seconds, then turn it ‘OFF’. Repeat this 2-3 times to allow the vehicle’s systems to recognize the new module before starting the engine.
Guaranteed Compatibility for Your 2009 SRX ECM
This module is a direct replacement for your 2009 Cadillac SRX equipped with the 4.6L engine. It is also a verified fit for a wide range of other GM vehicles and cross-references with multiple service numbers, guaranteeing you receive the correct part.
Replaces Part Numbers: 12636659, 12639300, 1263605, 12628993, 12628911, 12625453, 12622175, 12630464, 12678512
Please provide your vehicle’s 17-digit VIN at checkout so we can program the module before shipment. This is a critical step to ensure a successful repair.