

Restore Full Electrical Control to Your HUMMER H2
If you’re dealing with the maddening electrical gremlins in your 2008-2009 HUMMER H2—like flickering dash lights, malfunctioning power windows, or a security system that has a mind of its own—you’ve likely pinpointed the culprit: a failing Body Control Module (BCM). As a technician with over two decades of experience, I can tell you that the BCM is the central nervous system for your vehicle’s comfort and convenience features. When it fails, the symptoms can be widespread and confusing. This isn’t just a part; it’s the solution to getting your rugged H2 back to functioning reliably.
This replacement BCM is a direct-fit, plug-and-play solution. We take the guesswork and the expensive dealership trip out of the equation. Before we ship it, our experts will program the module with the latest GM software, specifically matched to your vehicle’s VIN. This ensures that when you receive it, it’s ready to integrate seamlessly with your H2’s existing systems. No extra programming fees, no hassle.
A Technician’s Notebook: The Phantom Battery Drain
I once had a 2008 HUMMER H2 in my bay with a classic case of phantom battery drain. The owner had already replaced the battery twice and was about to replace a perfectly good alternator. Every morning, the battery was dead. After checking all the usual suspects, I hooked up an ammeter and started pulling fuses. The draw finally dropped when I pulled the BCM fuse. The internal circuitry of the original BCM had failed, keeping the interior lighting relay energized overnight. A new, properly programmed BCM solved the problem instantly. It’s a reminder that a bad BCM doesn’t always throw a specific code; sometimes, it just causes chaos behind the scenes.
Is Your HUMMER H2 Showing These Symptoms?
A failing BCM can manifest in numerous ways. If your truck is experiencing any of the following, a faulty BCM is the most likely cause. Over the years, I’ve seen these issues hundreds of times, often accompanied by communication error codes like U0140, U0155, or B1001.
- ✔ Erratic or non-functional interior and exterior lights (headlights, dome lights).
- ✔ Power windows, door locks, or mirrors working intermittently or not at all.
- ✔ The security system acting up, causing false alarms or no-start conditions.
- ✔ Wipers behaving erratically (e.g., won’t turn off).
- ✔ Unexplained battery drain that leaves you stranded.
- ✔ Warning lights on the dash for various systems (Airbag, ABS) due to communication loss.
Your Straightforward H2 BCM Installation Guide
Installing your new BCM is a manageable job for a confident DIYer. For the 2008-2009 HUMMER H2, the BCM is located on the left-hand (driver’s side) firewall. Always prioritize safety.
- Step 1: Safety First
Disconnect the negative terminal from your vehicle’s battery and secure it away from the post to prevent accidental reconnection. - Step 2: Locate the BCM
On your H2, you’ll find the BCM mounted to the firewall, typically up under the driver’s side of the dashboard. You may need to remove a lower dash panel for access. - Step 3: Disconnect and Remove
Carefully unplug all the electrical connectors from the old BCM. They have locking tabs that need to be depressed. Once disconnected, unbolt the module from its mounting bracket. - Step 4: Install the New Module
Mount your new, pre-programmed BCM in the same location. Securely reconnect all the electrical connectors, ensuring they click into place. - Step 5: Reconnect and Test
Reconnect the negative battery terminal. Turn the key to the ‘On’ position (without starting the engine) and test your lights, locks, and windows to confirm functionality.
Post-Installation Checks
While this module is programmed for your VIN, some vehicles may require a simple ‘relearn’ or ‘sync’ procedure for specific systems after installation. This is normal. The most common are:
- Airbag System Sync: If the airbag warning light is on after installation, a professional scan tool is needed to perform the “Setup SDM Primary Key in BCM” procedure. This syncs the new BCM with the airbag system.
- Brake Pedal Position Relearn: On some models, a brake pedal position sensor relearn may be required to ensure your brake lights and traction control function correctly.
Verified Vehicle Compatibility
This Body Control Module is a guaranteed fit for the 2008-2009 HUMMER H2. It also serves as a direct replacement for a wide range of other GM vehicles that use the same hardware platform. Please verify your original part number against our extensive cross-reference list below to ensure perfect compatibility.
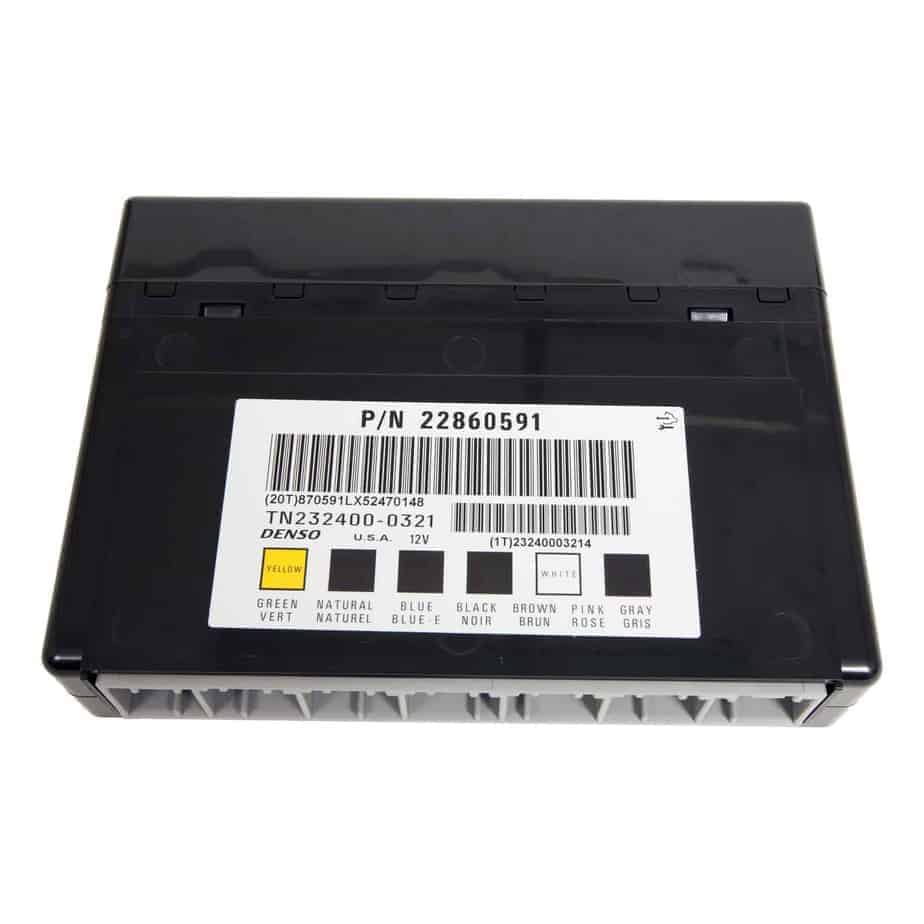
Replaces Part Numbers: 10382479, 15093910, 15276271, 15299986, 15819552, 15828601, 15837419, 15872388, 15872421, 15880684, 15921352, 15921353, 15948438, 15948439, 20815898, 20839063, 20864767, 20864768, 20921435, 20921436, 20935349, 22860591, 25826124, 25826125, 25847588, 25847589, 25892622, 25910474, 25934762, 25934763, 95151084
ACADIA 07-12 Body Control (BCM); (LH dash)
AVALANCHE 1500 10 Body Control (BCM); (under steering column), ID 25892622
CAPRICE 11-13 Body Control (BCM)
CAPTIVA SPORT 12 Body Control (BCM); (center dash), ID 20921435, 20921436, 22860591
CTS 08-13 Body Control (BCM); LH dash
DTS 06-11 Body Control (BCM); (RH center dash)
ENCLAVE 08-12 Body Control (BCM); (LH dash)
EQUINOX 07-09 Body Control (BCM); (center dash)
ESCALADE 10 Body Control (BCM); (under steering column), ID 20815898, 25892622
ESCALADE ESV 10 Body Control (BCM); (under steering column), ID 20815898, 25892622
ESCALADE EXT 10 Body Control (BCM); (under steering column), ID 25892622
EXPRESS/SAVANA VANS 08-12 Body Control (BCM); (center dash)
G8 08-09 Body Control (BCM); (center dash)
IMPALA 06-13 Body Control (BCM); (LH dash)
LUCERNE 06-11 Body Control (BCM); (right side dash)
MONTE CARLO 06-07 Body Control (BCM); (LH steering column)
OUTLOOK 07-10 Body Control (BCM); (center dash)
SRX 07-09 Body Control (BCM); LH dash
STS 10 Body Control (BCM); center dash
SUBURBAN 1500 10 Body Control (BCM); (under steering column), ID 20815898, 25892622
TAHOE 10 Body Control (BCM); (under steering column), ID 20815898, 25892622
TORRENT 07-09 Body Control (BCM); (center dash)
TRAVERSE 09-12 Body Control (BCM); (LH dash)
VUE 08-10 Body Control (BCM); (center dash)
YUKON 10 Body Control (BCM); (under steering column), ID 20815898, 25892622
YUKON XL 1500 10 Body Control (BCM); (under steering column), ID 20815898, 25892622
…and other models. Please match your part number.
Do I need to do any programming myself?
Do I need to do any programming myself?
No. We handle all the programming for you before shipment. Simply provide your vehicle’s VIN during or after checkout, and we’ll flash the module with the latest GM software specific to your H2. It arrives ready to install.
Is there a core charge for this BCM?
Absolutely not. There is no core charge on this part. You can keep your old module, so you don’t have to worry about the hassle and expense of shipping it back.
Will this fix my ‘Service 4WD’ message?
While the BCM communicates with nearly every module, 4WD system issues are often related to the Transfer Case Control Module (TCCM) or sensors at the transfer case. A failing BCM can sometimes cause communication-related errors, but you should diagnose the 4WD system specifically if that’s your primary issue.
What tools are required for installation?
Basic hand tools are all that’s needed for the physical installation—typically a socket set to remove the module bolts and possibly a trim removal tool for any dash panels. No special electronic tools are required for the installation itself, though a professional scan tool might be needed for post-install relearn procedures in some cases.
What if I still have problems after installing the new BCM?
If issues persist, it’s possible there is another underlying problem, such as a faulty ground, a wiring issue, or a different failing module. Double-check all connections first. If you need further diagnostic help, we recommend consulting a factory service manual or a qualified technician.