

Is Your GM Running Rough, Stalling, or Showing a Check Engine Light?
Dealing with a finicky engine in your trusted 1996 GM vehicle can be incredibly frustrating. One moment it’s your reliable daily driver, and the next it’s stalling at a stoplight, shifting erratically, or refusing to start altogether. These aren’t just annoyances; they’re signs that the brain of your engine, the Powertrain Control Module (PCM), may be failing. Instead of throwing parts at the problem, get the definitive solution with our pre-programmed engine computer, designed to get you back on the road with confidence.
Common Symptoms of a Failing PCM & Your Direct-Fit Solution
A faulty PCM can cause a cascade of confusing issues. If you’re experiencing any of the following, this module is the reliable fix you need:
- Persistent Check Engine Light (CEL)
- Unexplained engine stalling or stumbling
- Rough or inconsistent idling
- Poor acceleration and overall engine performance
- Decreased fuel economy
- Harsh or erratic automatic transmission shifting
- Complete no-start condition where the engine cranks but won’t fire
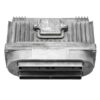
This 1996 GM PCM 16211539 is the central command unit for your engine and transmission. We take the guesswork out of the repair by flashing the unit with the latest GM software updates, specifically calibrated to your vehicle’s unique Vehicle Identification Number (VIN). This ensures seamless communication between all components, restoring the original performance and reliability you depend on.
Features & Benefits
- ✔ Plug & Play Installation: This unit arrives pre-programmed to your specific VIN. No expensive trips to the dealer for flashing are required.
- ✔ Resolves Common Issues: Directly addresses drivability problems caused by a faulty original computer, from stalling to poor mileage.
- ✔ Updated GM Software: Programmed with the newest calibrations from General Motors, ensuring optimal engine and transmission operation.
- ✔ Broad Compatibility: A direct replacement for service numbers 16211539, 88963800, and 16231853, fitting a wide range of 1996 GM cars and vans.
- ✔ Guaranteed Protection: This unit is backed by our one-year replacement warranty.
Expert Insight: The Critical Role of VIN Programming
Back in the mid-90s, GM’s Vehicle Anti-Theft System (VATS) became more integrated into the PCM. Simply swapping a computer from another vehicle, even an identical one, will often result in a no-start condition because the VATS key code in the replacement PCM doesn’t match your vehicle’s system. Our VIN-specific programming process ensures this security handshake is correct from the moment you plug it in. We’re not just selling a part; we’re delivering a fully integrated solution that respects your vehicle’s factory systems, saving you the headache of a car that won’t start after the repair.
Frequently Asked Questions
Do I need to do any programming myself?
No. This is the biggest benefit of our service. We program the 1996 GM PCM 16211539 to the VIN you provide before we ship it. This makes the installation a simple plug-and-play process for you or your mechanic.
Where do I provide my vehicle’s VIN?
After you complete your purchase, you will need to send us your 17-digit VIN. We cannot ship your part until we receive this information, as it is essential for the programming process.
Is this compatible with my specific car?
This module fits a wide variety of 1996 GM models including the Park Avenue, LeSabre, Bonneville, Lumina, Monte Carlo, and many more with the 3.1L, 3.4L, or 3.8L engines. Please check the detailed fitment list on this page to confirm your vehicle is included.
What if my problem isn’t fixed after installation?
While this PCM often resolves the symptoms listed, it’s important to ensure your vehicle has been properly diagnosed. If issues persist, it may indicate another problem (e.g., a faulty sensor or wiring). Our one-year replacement warranty covers the part itself in case of any defects.
How difficult is the installation process?
For most 1996 GM vehicles, the PCM is located in the engine bay and is relatively accessible. The process typically involves disconnecting the battery, unplugging the electrical connectors, unbolting the old module, and installing the new one. It’s a manageable job for a confident DIYer with basic tools.