

Restore Your Vehicle’s Brainpower and Drivability
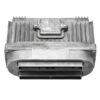
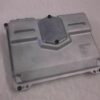
If your 1996 GM vehicle is suffering from frustrating issues like intermittent stalling, a persistent Check Engine Light, no-start conditions, or erratic engine behavior, the culprit is often a failing Powertrain Control Module (PCM). As an automotive technician with over two decades of experience, I’ve seen firsthand how a faulty engine computer can cripple an otherwise solid car or truck. This isn’t just an inconvenience; it affects fuel economy, emissions, and overall vehicle safety. This replacement 1996 Achieva PCM is the definitive, reliable solution to get your vehicle running smoothly again.
We take the guesswork and hassle out of the repair. Unlike pulling a module from a junkyard with an unknown history, each PCM we provide is meticulously programmed with the latest GM software updates specifically for your vehicle. Simply provide us with your Vehicle Identification Number (VIN) after your purchase, and we handle the complex programming before it even ships. This ensures a seamless installation process, eliminating the need for an expensive trip to the dealership for flashing. It’s designed to restore your engine’s performance and efficiency to factory standards.
Case Study: A Tricky Diagnosis
I remember a 1996 Chevy S10 that came into the shop a few years back. The owner had replaced the fuel pump, ignition coil, and spark plugs chasing a random no-start condition. The truck would run fine for days, then refuse to start for an hour. No consistent codes were stored, except for an occasional P0601 (Internal Control Module Memory Check Sum Error) that would appear and vanish. After verifying power and ground to the computer, we knew the PCM itself was failing internally. Swapping in a pre-programmed module like this one solved the problem instantly. It’s a classic example of how a failing PCM can mimic other component failures, making a reliable replacement the key to a final repair.
Common Signs of a Failing PCM in Your 1996 GM Vehicle
A failing engine computer can manifest in numerous ways. If you’re experiencing any of the following, it’s a strong indicator that your PCM needs attention:
- ✔ Persistent Check Engine Light (CEL)
- ✔ Diagnostic Trouble Codes (DTCs) related to internal module failure, such as P0601, P0603, or P0605.
- ✔ Engine stalling or shutting off unexpectedly while driving.
- ✔ Rough or erratic idling.
- ✔ A complete no-start condition where the engine cranks but won’t fire up.
- ✔ Noticeable decrease in fuel efficiency.
- ✔ Failure to pass an emissions test.
A Straightforward Guide to Your PCM Swap
Installing your new 1996 Achieva PCM is a manageable job for a DIY enthusiast. Following these steps ensures a smooth process:
- Safety First: Always disconnect the negative terminal from your vehicle’s battery and wait at least 15 minutes to allow capacitors to discharge.
- Locate the PCM: On most of these 1996 GM models, the PCM is located in the engine bay, often near the firewall or inside the air filter housing.
- Disconnect Connectors: Carefully unlatch and remove the electrical wiring harnesses connected to the old module. Inspect the connectors for any corrosion or damage.
- Remove the Old Module: Unbolt the old PCM from its mounting bracket. Keep the hardware as you will need it for the new unit.
- Install the New PCM: Mount your new, pre-programmed PCM onto the bracket and securely fasten it.
- Reconnect Everything: Plug the wiring harnesses back into the new module until they click firmly into place. Reconnect the negative battery terminal.
- Security Relearn (If Necessary): Some vehicles may require a simple security relearn procedure, which typically involves turning the key to the ‘ON’ position for 10-15 minutes. Consult your vehicle’s service information for specific steps. Your vehicle is now ready to drive.
Verified Vehicle Compatibility List
This module is a direct-fit replacement for part numbers 16215830 and 16231851. It is guaranteed to be compatible with the following 1996 models:
- ✔ ACHIEVA: with 4-146 (2.4L) engine
- ✔ BERETTA: with 4-134 (2.2L) engine
- ✔ CAVALIER: all options
- ✔ CENTURY: with 4-134 (2.2L) engine
- ✔ CIERA: with 4-134 (2.2L) engine
- ✔ CORSICA: with 4-134 (2.2L) engine
- ✔ GRAND AM: with 4-146 (2.4L) engine
- ✔ S10/S15/SONOMA: with 4-134 (2.2L) engine
- ✔ SKYLARK: with 4-146 (2.4L) engine
- ✔ SUNFIRE: all options
Frequently Asked Questions
Why do you need my VIN?
Your Vehicle Identification Number (VIN) contains critical information about your vehicle’s specific options, engine, and transmission. We use the VIN to load the correct, factory-approved GM software and calibrations onto the PCM, ensuring it works perfectly with your vehicle right out of the box.
Is this a simple plug-and-play installation?
Yes! Because we program the module to your VIN before shipping, it eliminates the need for dealer-level programming tools. In most cases, you simply install the module and the vehicle will start and run correctly. Some models may require a simple security relearn procedure that you can do yourself.
Will this fix my no-start problem?
If your no-start issue has been diagnosed as a faulty PCM, this part is the solution. Common symptoms of a PCM-related no-start include the engine cranking but not firing, or a lack of signal to the fuel injectors or ignition coils, often confirmed by diagnostic codes like P0601.
What is the difference between this and a junkyard part?
A junkyard PCM has an unknown history, may be faulty, and will be programmed for a different vehicle’s VIN, causing compatibility issues. Our units are tested, verified, and programmed with the latest software specifically for your car, providing a reliable, long-term repair.
Do I need to perform a CASE relearn?
A Crankshaft Variation Relearn (CASE relearn) may be required after installation to prevent a P1336 trouble code. This procedure synchronizes the PCM with the crankshaft position sensor. Many professional scan tools can perform this, or it can be done by a local repair shop if needed.