

Restore Your Truck’s Brain: The 2010 Avalanche 1500 BCM Solution
If your 2010 Chevy Avalanche is starting to act haunted—with flickering lights, malfunctioning power windows, or random warning chimes—the culprit is often the Body Control Module (BCM). As the central command for your truck’s electronics, a failing BCM can cause a cascade of frustrating and unpredictable problems. This isn’t just an annoyance; it’s a critical component for your vehicle’s proper function and security. We offer a reliable, straightforward solution: a replacement BCM, part number 25847589, that arrives at your door programmed specifically for your truck.
Case Study: A Tricky Diagnosis
A customer brought in his 2010 Avalanche with a list of bizarre symptoms: the radio would turn on by itself, the driver’s side power lock was dead, and the ‘Service 4WD’ light would pop on intermittently. He’d already replaced the battery and checked fuses with no luck. After connecting my scan tool, I saw multiple U-codes (communication errors), pointing to a network issue. In my 20+ years of experience, this pattern almost always leads back to a failing BCM. The internal logic board develops micro-fractures, causing erratic communication. We installed one of our pre-programmed modules, and every single issue vanished instantly. It’s a fix I’ve performed hundreds of times, turning a complex electrical headache into a simple, satisfying repair.
Is Your Avalanche Showing These Symptoms?
A faulty BCM can manifest in numerous ways. If you’re experiencing any of the following, this module is likely the solution you need:
- ✔ Erratic or non-functional interior and exterior lights.
- ✔ Power windows, mirrors, or door locks working intermittently or not at all.
- ✔ The security system acting up, causing no-start conditions or a persistent alarm.
- ✔ The radio or climate control system behaving erratically.
- ✔ False warnings on the instrument cluster (e.g., ‘Service Airbag System’).
- ✔ Diagnostic Trouble Codes (DTCs) related to communication, such as U0140, U0155, or B1001.
A Straightforward Guide to Your BCM Installation
Replacing the 2010 Avalanche 1500 BCM is a manageable job for a confident DIYer. Because we handle the programming, you can skip the expensive trip to the dealership. The BCM is typically located under the driver’s side of the dashboard, near the steering column.
- Safety First: Always disconnect the negative terminal from your vehicle’s battery and wait about 15 minutes to allow all systems to power down completely.
- Locate the BCM: On the 2010 Avalanche, you’ll find the BCM mounted under the dash to the left of the steering column. You may need to remove a lower dash panel for access.
- Disconnect and Remove: Carefully unplug the electrical connectors. They have locking tabs that need to be depressed. Once disconnected, unbolt the module from its mounting bracket.
- Install the New Module: Mount your new, pre-programmed BCM in the same location and securely reconnect all the electrical harnesses. Ensure they click into place.
- Reconnect and Test: Reconnect the negative battery terminal. Turn the key to the ‘On’ position (without starting the engine) and test your lights, locks, and windows to confirm proper operation.
Important Post-Installation Steps
While our cloning service makes this a near plug-and-play process, some GM vehicles may require additional steps to ensure all systems communicate correctly. Please be aware of the following:
- Airbag System Sync: If the airbag warning light is illuminated after installation, a professional scan tool is needed to perform the ‘Setup SDM Primary Key in BCM’ procedure. This syncs the new BCM with the airbag system. This is only necessary if the light is on.
- Brake Pedal Position Relearn: On some models, a brake pedal position sensor recalibration may be required to ensure your brake lights and traction control system function correctly.
Disclaimer: Vehicle systems can vary. We always recommend consulting a factory service manual or a certified technician if you are unsure about any part of the process.
Verified Vehicle Compatibility
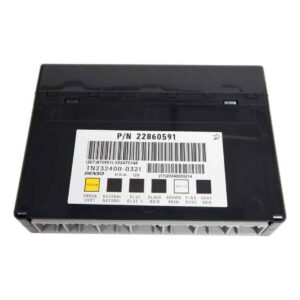
This Body Control Module is a direct fit for a wide range of GM vehicles. Please match your original part number to the list below or confirm your vehicle is listed. This part is a direct replacement for part numbers: 10382479, 15093910, 15276271, 15299986, 15819552, 15828601, 15837419, 15872388, 15872421, 15880684, 15921352, 15921353, 15948438, 15948439, 20815898, 20839063, 20864767, 20864768, 20921435, 20921436, 20935349, 22860591, 25826124, 25826125, 25847588, 25847589, 25892622, 25910474, 25934762, 25934763, 95151084.
ACADIA 07-12
CAPRICE 11-13
CAPTIVA SPORT 12 (ID 20921435, 20921436, 22860591)
CTS 08-13
DTS 06-11
ENCLAVE 08-12
EQUINOX 07-09
ESCALADE 10 (ID 20815898, 25892622)
ESCALADE ESV 10 (ID 20815898, 25892622)
ESCALADE EXT 10 (ID 25892622)
EXPRESS VANS 08-12
G8 08-09
HUMMER H2 08-09
IMPALA 06-13
LUCERNE 06-11
MONTE CARLO 06-07
OUTLOOK 07-10
SAVANA VANS 08-12
SRX 07-09
STS 10
SUBURBAN 1500 10 (ID 20815898, 25892622)
TAHOE 10 (ID 20815898, 25892622)
TORRENT 07-09
TRAVERSE 09-12
VUE 08-10
YUKON 10 (ID 20815898, 25892622)
YUKON XL 1500 10 (ID 20815898, 25892622)
Frequently Asked Questions
Frequently Asked Questions
Do I need to do any programming myself?
No. This is the main benefit of our service. We perform a cloning service by programming the replacement module with your vehicle’s VIN and specific configuration data before we ship it. This ensures it’s ready for installation right out of the box.
How do I provide my VIN?
After you complete your purchase, you will need to send us your 17-digit Vehicle Identification Number (VIN). We cannot process your order without it. This ensures a perfect data match for your truck.
What is the ‘Cloning Service’?
This means we transfer the critical data from your original BCM to the replacement unit. This makes the installation process much smoother and often eliminates the need for complex key relearn procedures or other initializations required with a brand new, unprogrammed module from a dealer.
Do I need to send my old BCM back?
No, you keep your original part. Our policy is to always return the customer’s original module along with the programmed replacement unit. There is no core charge or return required.
Is this a difficult part to replace for a DIYer?
For someone with basic mechanical skills and hand tools, this is a very manageable repair. The primary challenge is accessing the module under the dashboard. Since the programming is done, the most complex part of the job is already handled for you.