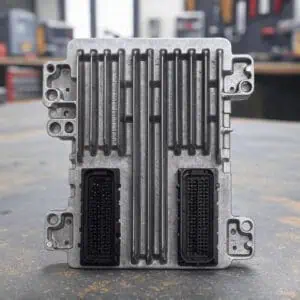
How to Remove and Install Your Replacement ECM in GM Vehicles
Replacing the Engine Control Module (ECM) in your GM vehicle can restore optimal engine performance, especially if you’re dealing with symptoms like stalling, misfiring, or a check engine light. At Highway 71 Auto Parts, our pre-programmed ECMs are matched to your vehicle’s VIN for a seamless plug-and-play experience, eliminating the need for dealer reprogramming in most cases. However, proper removal and installation are crucial to avoid damage. This guide provides a general step-by-step process for GM vehicles (such as Chevrolet Silverado, GMC Sierra, or similar models). Always refer to your vehicle’s service manual for model-specific details, as locations and procedures can vary.
Important Safety Notes: Work in a well-ventilated area, wear safety glasses, and ensure the vehicle is parked on a flat surface with the parking brake engaged. If you’re not comfortable with automotive repairs, consult a professional mechanic.
Tools and Materials Needed
- Socket set (commonly 7mm, 10mm, or 13mm sockets)
- Ratchet and extensions
- Screwdrivers (flathead and Phillips)
- OBD-II scanner (optional, for clearing codes post-install)
- Replacement ECM (pre-programmed from Highway 71 Auto Parts)
Step-by-Step Guide to Removing the Old ECM
- Disconnect the Battery: Locate the battery (usually under the hood) and disconnect the negative (-) terminal using a wrench. This prevents electrical shorts and resets the system. Wait at least 30 minutes for any residual power to discharge.
- Locate the ECM: In most GM vehicles, the ECM is mounted in the engine compartment—often near the battery, on the fender well, or under a plastic cover below the battery tray. For trucks like the Silverado, it may be behind the driver’s side headlight or in the fuse box area. Remove any covers or panels securing it (typically held by clips or bolts).
- Disconnect Wiring Harnesses: Carefully unplug the electrical connectors from the ECM. These are usually secured with tabs or clips—press the release tabs while gently pulling. Avoid forcing them to prevent damage to pins or wires. Note the positions if there are multiple connectors.
- Remove Mounting Bolts: Unscrew any bolts or brackets holding the ECM in place (often 1-4 bolts). Gently lift the ECM out, handling it by the edges to avoid touching sensitive components.
- Safely Store the Old ECM: Place the removed ECM in an anti-static bag or safe location if you need to reference it or return it as a core.
Step-by-Step Guide to Installing the New ECM
- Position the New ECM: Align the replacement ECM in the mounting location, ensuring it fits securely. If applicable, transfer any brackets or hardware from the old unit.
- Secure with Bolts: Tighten the mounting bolts to the manufacturer’s torque specs (typically hand-tight plus a quarter turn to avoid over-tightening).
- Reconnect Wiring Harnesses: Plug in the electrical connectors, ensuring they click into place. Double-check for proper seating to prevent connection issues.
- Reconnect the Battery: Attach the negative battery terminal and tighten it securely.
- Perform Any Relearn Procedures: For some GM models, a security relearn or idle relearn may be needed:
- Turn the key to the ON position (without starting) for 10-15 minutes, then off for 30 seconds. Repeat 2-3 times if anti-theft lights flash.
- Start the engine and let it idle for 5-10 minutes to allow the ECM to adapt.
- Use an OBD-II scanner to clear any diagnostic trouble codes (DTCs).
Our pre-programmed modules minimize this, but consult your manual if issues persist.
Post-Installation Tips
- Test drive the vehicle in a safe area to check for smooth operation.
- Monitor for warning lights; if they appear, scan for codes and verify connections.
- If the vehicle doesn’t start, recheck battery connections and harness plugs—common issues stem from incomplete resets.
- For optimal performance, ensure your replacement ECM is VIN-matched, as provided by Highway 71 Auto Parts.
What to Do Next
Ready to get your GM vehicle back on the road? Browse our selection of pre-programmed ECMs at Highway 71 Auto Parts, complete with a one-year warranty and no core charges. If you need help selecting the right module or have questions about installation, contact our team today.
Disclaimer: This guide is for informational purposes only and is not a substitute for professional automotive service. Procedures may vary by model and year. Always follow your vehicle’s service manual and safety guidelines. Highway 71 Auto Parts is not responsible for any damage or injury resulting from improper installation.
