
Experiencing Baffling Electrical Issues?
Is your vehicle acting possessed? Flickering lights, malfunctioning power windows, a security system that won’t cooperate, or a dashboard lit up with random warning lights are all classic signs of a failing Body Control Module (BCM). The BCM is the central command center for your vehicle’s body electronics, and when it starts to fail, it can cause a cascade of frustrating and unpredictable problems. Don’t let these electrical gremlins disrupt your daily drive. This is your direct, reliable solution to restore order and get your vehicle functioning perfectly again.
Common Symptoms of a Failing BCM & Your Solution
A faulty BCM can be difficult to diagnose, often mimicking other issues. If you’re experiencing any of the following, your BCM is the likely culprit:
- Erratic interior or exterior lights (staying on, not turning on, or flickering)
- Power windows, door locks, or mirrors not working correctly
- The security system or keyless entry fails intermittently
- Unexplained battery drain when the vehicle is off
- Warning lights (like Airbag or ABS) appearing on the dash for no reason
- The vehicle won’t start, or the starter won’t engage
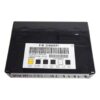
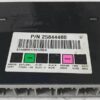
This Programmed GM Body Control Module 15921353 is the definitive answer to these problems. We take a quality-tested unit and flash it with the latest official GM software, specifically matched to your vehicle’s unique VIN. This ensures that when it arrives, it’s ready to communicate with all your vehicle’s other systems flawlessly, just like the original part from the factory.
Expert Insight: Why VIN-Specific Programming is Crucial
Think of the BCM as your vehicle’s central nervous system for all non-engine related functions. It manages everything from your dome light to your anti-theft system. Every vehicle has a slightly different combination of options (e.g., sunroof, power seats, specific lighting). VIN programming isn’t just a suggestion; it’s a requirement. It tells the BCM exactly what features your car has, ensuring seamless operation. Installing a non-programmed module is like trying to run a computer with the wrong operating system—it simply won’t work correctly. Our pre-programming service saves you a costly trip to the dealership and guarantees a successful repair.
Features & Benefits
- ✔ Ready for Installation: This module arrives pre-programmed to your vehicle’s VIN. No expensive dealership programming is required.
- ✔ Restores Full Functionality: Eliminates frustrating electrical issues and gets your power accessories, lighting, and security systems working like new.
- ✔ Updated Software: Flashed with the newest updates from GM, ensuring optimal performance and resolving potential factory bugs.
- ✔ Guaranteed Compatibility: By programming to your VIN, we ensure this Programmed GM Body Control Module 15921353 is a perfect match for your vehicle’s specific options and systems.
- ✔ Cost-Effective Repair: Get a dealership-level fix without the dealership price tag or hassle.
- ✔ This unit is backed by our one-year replacement warranty.
Frequently Asked Questions
What exactly does a Body Control Module do?
The Body Control Module, or BCM, is a computer that controls and monitors most of your vehicle’s electronic accessories that are not part of the engine system. This includes power windows, door locks, interior and exterior lighting, the anti-theft system, wipers, and more.
Why do I need to provide my VIN?
Your Vehicle Identification Number (VIN) is essential because it allows us to program the BCM with the specific software and settings for your vehicle’s exact features and options. This step ensures the module works correctly right out of the box and is a critical part of our service.
Is this part difficult to install?
For someone with moderate mechanical experience, replacing a BCM is generally straightforward. It typically involves disconnecting the battery, accessing the module (location varies by model, see your fitment details), and swapping the electrical connectors. The most difficult part—the programming—is already done for you.
Will I need to perform any procedures after installation?
In some cases, post-installation procedures like a Brake Pedal Position Relearn or an Airbag System Sync may be necessary. These are typically required only if specific warning lights appear after the new module is installed and can often be performed by a qualified technician with a professional scan tool.
How can I be sure my BCM is the problem?
While the symptoms listed are strong indicators, the best way to be certain is to have a professional diagnosis performed. A technician can use a high-level scan tool to check for communication errors (U-codes) or specific fault codes related to the BCM.
How do I confirm this Programmed GM Body Control Module 15921353 fits my vehicle?
Please check the extensive list of compatible makes and models provided on this page. Matching one of the listed part numbers to your original unit is the best way to guarantee a perfect fit. If you are unsure, please contact us with your VIN before ordering.