
Is Your Avalanche Plagued by Bizarre Electrical Problems?
If your 2010 Chevrolet Avalanche is experiencing a frustrating mix of electrical issues—like interior lights acting up, power windows and locks working intermittently, or the security system going haywire—a failing Body Control Module (BCM) is the most likely culprit. The BCM is the central command center for your truck’s body electronics, and when it fails, it can make your vehicle feel unreliable and chaotic. This isn’t just an annoyance; it’s a breakdown in your truck’s core functionality. We offer a simple, direct, and effective solution to restore order and get your truck back to operating exactly as it should.
Common Symptoms of a Failing BCM & Your Direct Solution
A faulty BCM can manifest in numerous ways, often leaving owners and even some mechanics guessing. If you’re noticing any of the following, it’s a strong indicator that you need a replacement:
- Erratic or non-functional interior and exterior lights
- Power windows, door locks, or mirrors behaving unpredictably
- The security system engaging randomly or preventing the engine from starting
- Warning lights on the dashboard with no apparent cause
- HVAC (heating and air conditioning) controls not responding
- Instrument cluster gauges dropping out or giving false readings
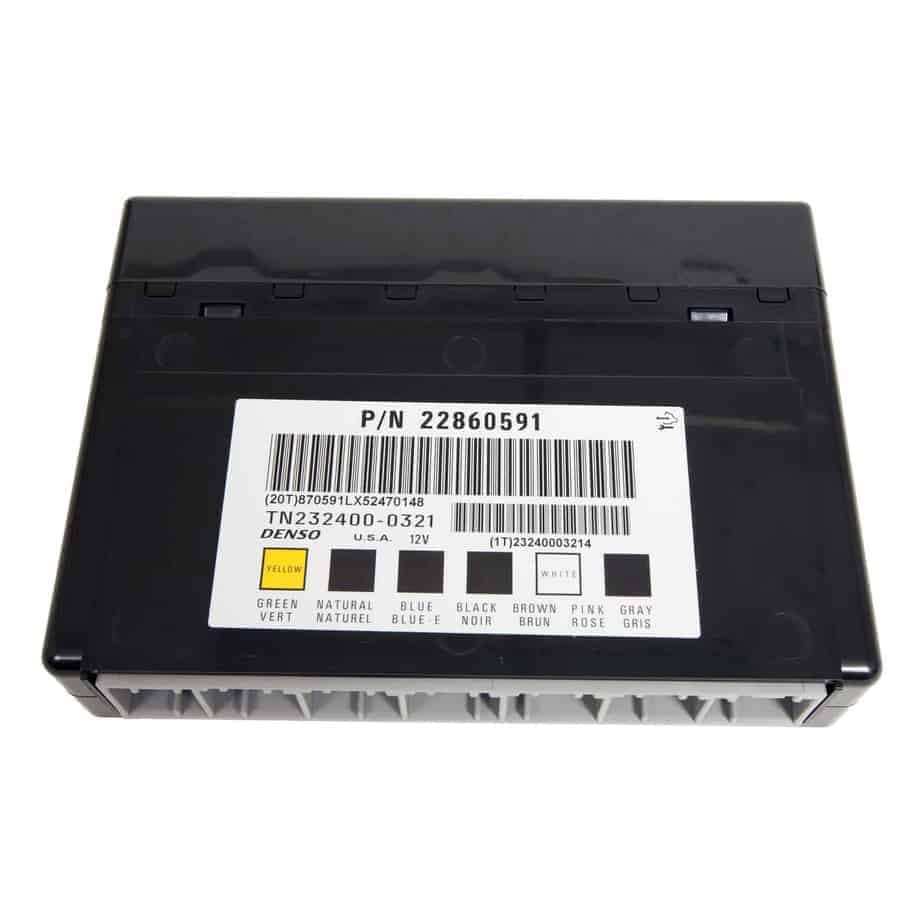
This pre-programmed 2010 Avalanche 1500 Body Control Module is the definitive fix for these issues. We take the guesswork and hassle out of the repair by flashing the unit with the latest GM software updates, specifically matched to your truck’s unique Vehicle Identification Number (VIN). This means it arrives at your door ready for installation, saving you from a costly and time-consuming trip to the dealership for programming.
Features & Benefits
- ✔ Plug & Play Installation: This module arrives pre-programmed to your vehicle’s VIN. No extra programming or dealer visit is required.
- ✔ Restores Full Functionality: Get your lights, locks, windows, and other electronic accessories working reliably again.
- ✔ Cost-Effective Solution: Avoid the high labor costs and programming fees charged by dealerships for a new BCM.
- ✔ Updated GM Software: We flash each module with the newest software available from GM to ensure optimal performance and compatibility.
- ✔ No Core Charge: You are not required to send your old, faulty module back to us.
- ✔ Peace of Mind: This unit is backed by our one-year replacement warranty.
An Expert’s Take: As a technician with over 20 years on the floor, I’ve seen the headaches a bad BCM can cause. In the past, the only option was a new module from the dealer, followed by a hefty bill for programming. This VIN-programmed solution changes the game. It empowers DIYers and independent shops to perform a complex repair efficiently and affordably. You’re not just buying a part; you’re buying a streamlined solution that gets the job done right, restoring the vehicle’s integrity and the owner’s confidence.
This 2010 Avalanche 1500 Body Control Module is a direct-fit replacement for a wide range of GM vehicles, ensuring broad compatibility. Please verify your part number against the extensive list provided to confirm fitment for your specific application. After purchase, simply provide us with your VIN, and we’ll handle the rest, shipping you a module that’s ready to restore your vehicle’s electrical system to perfect working order.
Frequently Asked Questions
How does the VIN programming process work?
After you complete your purchase, you will need to provide us with your vehicle’s 17-digit VIN. Our technicians use this number to access the latest GM software specific to your vehicle’s options and features. We then flash this software onto the Body Control Module before shipping it to you.
Do I need any special tools to install this BCM?
Installation typically requires basic hand tools to access the module’s location (often under the dash). However, as noted in our post-install procedures, a professional-grade scan tool may be required for specific relearn procedures, such as syncing the airbag system (SDM) or recalibrating the brake pedal position sensor if needed.
What happens if my airbag light comes on after installation?
In some cases, the new BCM needs to be electronically introduced to the airbag system’s Supplemental Deployment Module (SDM). If the airbag light is on after installation, a ‘Setup SDM Primary Key in BCM’ procedure must be performed with a compatible diagnostic tool to resolve it.
Will this fix all the electrical problems in my truck?
This 2010 Avalanche 1500 Body Control Module is designed to fix all issues directly caused by a failing BCM. While it resolves the vast majority of common electrical gremlins, it will not fix problems originating from other sources, such as a bad switch, faulty wiring, or a different failed module.
Is there a core charge for my old part?
No. We do not require you to return your original module, so there is no core charge or extra hassle involved.